Getting started: Installing the Requea Platform on your machine
- Manage
 Copy
Copy- Actions
 Export
 Print preview
 View Source
- Viewers
 Siblings
 Comments
- Annotations
 Attachments (6)
 History
 Information
Install the Database server
Requea supports several databases:
mySQL 5.0 and above (5.1 and above recommended)
Oracle 10g and above
Microsoft SQL server 2005 and above
- For the purpose of this small tutorial , we recommend that you install mysql on your environment if not already done : MySQL Install
- Create the requea database: (adapt mysql commands to your environment or your way of doing it):
Note : for UTF8 database, the create order is the following:
- Give all privileges to the requea user for accessing the requea database. For example (if you get connections problems try 127.0.0.1 instead of the localhost address below):mysql -u root -e "grant all privileges on requea.* to requea@localhost identified by 'password'"
Download the Requea dysoweb Platform
Dysoweb is a small OSGi platform created by Requea to build and compose modular Web applications.
Follow these instructions:
- Download and install dysoweb 1.0.19 or greater: download dysoweb on OW2 forge
Get the tomcat version (the tar version if your platform is Unix, Solaris, AIX or Mac OS X, and the .zip version if you are a Windows user)
- Unzip or untar the dysoweb-tomcat archive on a directory on your hard drive
- Make sure that you do not have already a tomcat instance running or any program using the port 8080.
- launch tomcat from a command prompt or shell:
on Unix:
on Windows:
bin\catalina.bat run
- open your favorite browser:
Get a configuration key on the REPO
The Requea Repository is an OSGi repository hosted at Requea used to manage Requea configurations. Since Requea applications are modular, each configuration describes which bundles (and bundle versions) should be installed on your dysoweb platform. A typical configuration contains the bundles for the platform and several bundles for the application you are installing.
A key is used to give access to a particular configuration. For the purpose of this tutorial, we will use a demo key which contains the open source dynapage platform and a few demo applications.
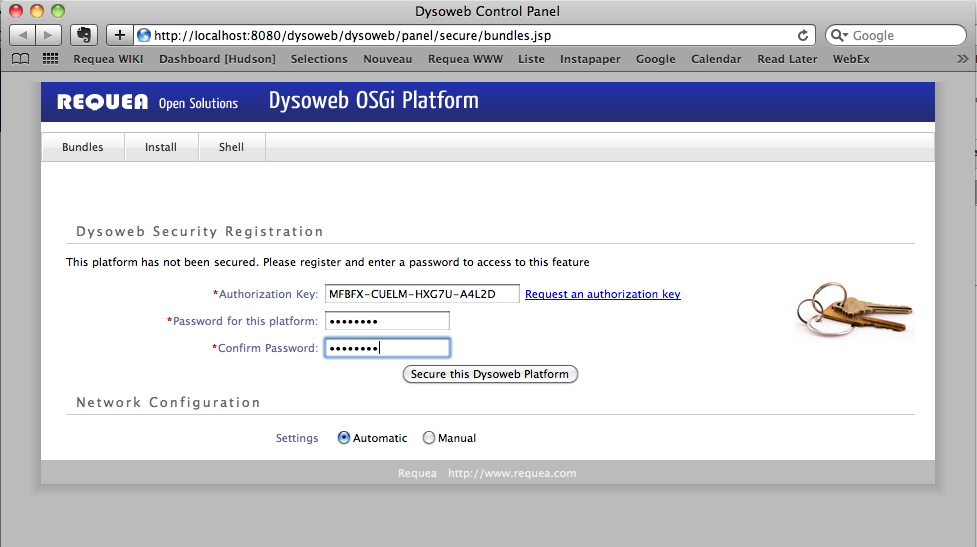
Right to the auth key input field you have a link to request a key on the requea repo. Register if you have no account, and request a demo key. The Key will be sent to you by email.
Enter a password for this platform. This password is the dysoweb administration platform. Do put an obvious platform and do not forget it (although there is a way to reset it in case you need).
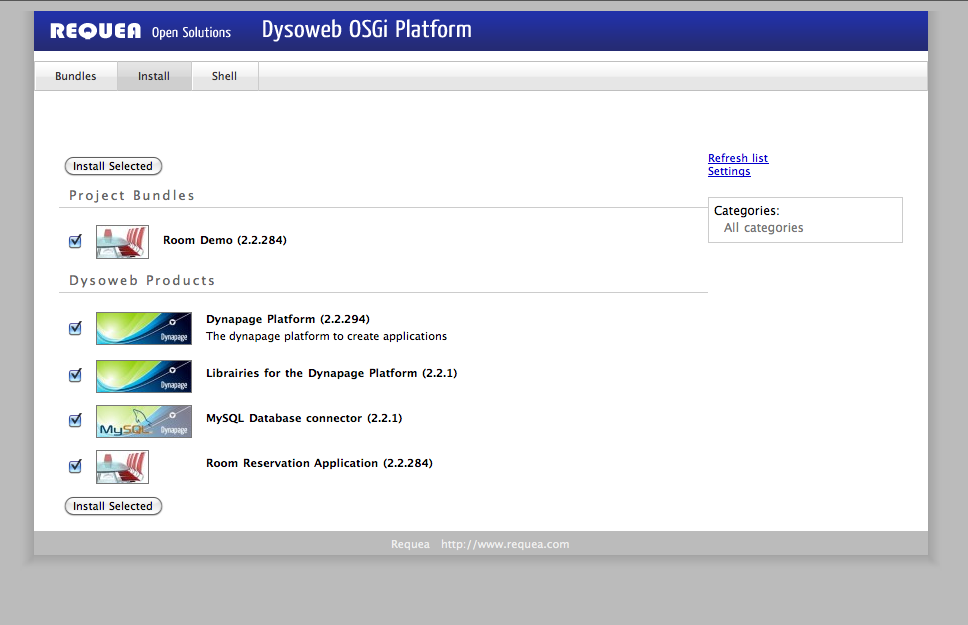
The platform will show you a list of bundles and products with some version numbers. Click on install and wait until all the bundles are downloaded and installed on your platform. (speed may depend on your network).
Configure database connexion
Once installed, you can go to the following URL:
http://localhost:8080/dysoweb/page
You will be prompted with a database connexion configuration screen:
NOTE for UTF8 database and mySQL, the JDBC URL is the following:
jdbc:mysql://localhost/requea?characterEncoding=UTF-8
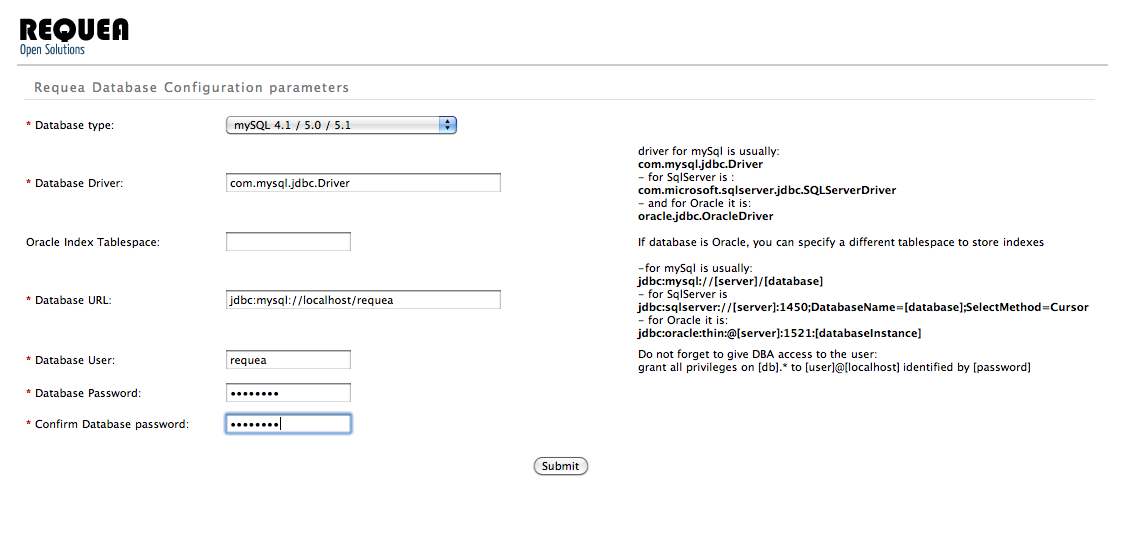
If you have left database name by default, the only thing you have to do is to enter the mySql daatabase password (the one you entered when typeing 'grant all privileges on requea.* to requea@localhost identified by "password")
The database will be created. It may take some time.
Once this is done, you should have a fully functional Requea platform with a sample room reservation application.
Trouble shoot:
- to change database configuration, go to the following URL:
http://localhost:8080/dysoweb/config?op=init
- HTTP Status 500 - Unable to retrieve user information: org.hibernate.exception.SQLGrammarException: could not load an entity:
Make sure that you have entered the proper "grant all" order, and that the password is correct.